
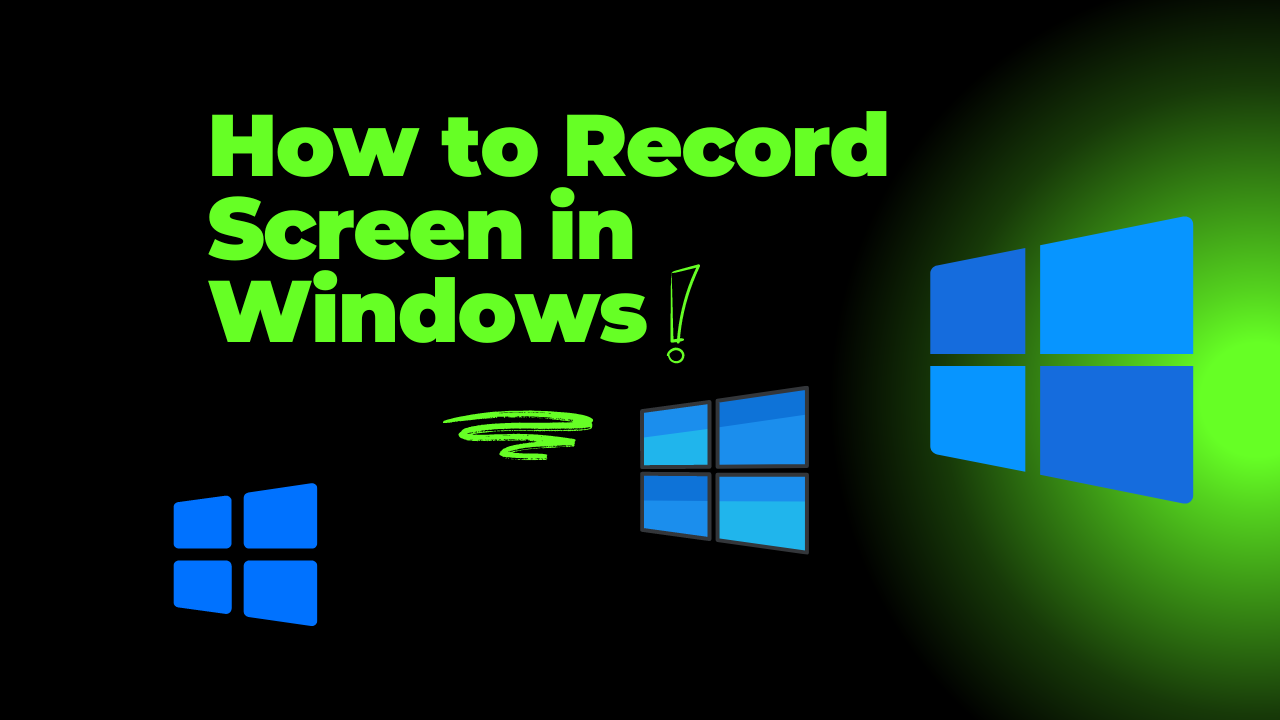
How to Record Screen in Windows 2024 There’s nothing more empowering than capturing your screen and sharing knowledge, right? In this post, I’m going to walk you through the super simple steps to record your screen in Windows 2024. Whether you want to create tutorials, record gameplay, or save your video calls, I’ve got you covered. Let’s gear up and dive in because with the right tools, your creativity knows no bounds. It’s time to take control of your screen and make those moments count!
Table of Contents
Understanding Screen Recording
To grasp the concept of screen recording, it’s imperative to know what it entails.
What is Screen Recording?
Some might think it’s just capturing what’s on your screen, but it’s so much more. Screen recording allows you to create a video of what’s happening on your computer, whether it’s gameplay, a tutorial, or a presentation. It’s a powerful tool to share knowledge and showcase your skills!
Benefits of Screen Recording
For anyone looking to elevate their communication, screen recording is a game-changer. It empowers you to visually relay information, enabling your audience to better understand the topics at hand. Plus, it serves as a great way to create content that resonates!
With screen recording, you can enhance your productivity and even boost your professional presence. It allows you to document your processes, share valuable tutorials with your team, and preserve important moments. Imagine being able to replay your insights or share critical information within seconds! This not only saves time but also improves clarity in your communications. Embrace this technology, and you’ll see how it can transform the way you engage with your audience.
How to Record Your Screen in Windows 2024
Even if you’re new to screen recording, I’m here to guide you through it. Let’s dive right into the fantastic options that Windows 2024 has to offer.
Using Built-in Tools
An easy way to record your screen is through the built-in tools in Windows. The Xbox Game Bar is a fantastic feature that allows you to capture your screen quickly and without fuss. Just press the Windows + G keys, and you’re off! It’s straightforward and user-friendly, making it perfect for anyone, whether you’re a pro or just starting out.
Third-Party Software Options
To amplify your recording experience, consider leveraging third-party software. There are plenty of programs out there like OBS Studio and Camtasia that can take your screen recording to another level. These tools often offer enhanced features like advanced editing, various format options, and better control over the recording process.
Another crucial thing to consider is that some of these programs may require a bit of a learning curve, but trust me, they’re worth it. They often come loaded with functionalities that can help you create high-quality content, ideal for tutorials, gaming videos, or even presentations that wow your audience. Plus, many offer free trials, so dig in and find what works best for you!
Setting Up Your Screen Recording
Clearly, setting up your screen recording is a vital step you can’t overlook. Before hitting that record button, it’s important to ensure your screen is organized and that any unnecessary notifications are turned off to keep your video professional and distraction-free.
It also helps to familiarize yourself with the recording tool you’re using, whether it’s a built-in feature or a third-party application. Run through the settings for audio input, resolution, and other aspects that can impact the final product. The goal is to create a seamless recording experience that showcases your content in the best light. Trust me, spending a few moments fine-tuning your setup can pay off in spades!
Tips for Effective Screen Recording
Your screen recording can make or break your content. To ensure that you produce high-quality videos, here are some tips that can elevate your recordings:
- Choose the right resolution for clarity.
- Set up your audio to enhance listening experience.
- Optimize your PC for performance to avoid lag.
- Plan your content to keep it engaging.
- Edit post-recording for a polished finish.
Thou should remember that a little prep can lead to great results!
Choosing the Right Resolution
Resolution is key to producing crisp, sharp visuals. Always aim for at least 1080p for standard recordings, as this ensures that your audience can see the fine details without any pixelation. Don’t hesitate to experiment with higher resolutions if your system can handle it!
Setting Up Your Audio
There’s no denying that audio quality is just as important as video. A great video with bad audio can turn off your viewers faster than you can imagine. So, make sure you invest in a good microphone and adjust your settings to capture crisp sounds and clear vocals.
This can make all the difference. A high-quality microphone paired with a quiet environment will significantly enhance the sound quality. Always run tests to check for background noise, echo, or volume inconsistencies. If you can, use audio editing software to further enhance or clean up your audio track before the final render.
Optimizing Your PC for Performance
Now, let’s talk about performance. Make sure your computer is running at its best to avoid any lag during recording. Close unnecessary applications, clear your cache, and ensure there’s sufficient disk space.
Understanding the system resources your screen recording software consumes is crucial. A strong CPU and sufficient RAM will make your recording process smoother. If your PC struggles, it might lead to stuttering or even crashes. Don’t forget to check for updates on your software to utilize the latest features and enhancements!
Common Factors to Consider
Keep these key points in mind when you’re ready to record your screen in Windows 2024:
- Storage space requirements
- File formats and compatibility
- Privacy considerations
This will help you make the best choices for your recording needs.
Storage Space Requirements
You need to think about how much storage space you have before hitting that record button. Screen recordings can take up a lot of disk space, especially if you’re capturing high-quality video. Having enough storage will ensure that your recordings don’t get cut off mid-session or, worse, corrupting valuable content.
File Formats and Compatibility
There’s a lot to consider when it comes to file formats and compatibility for your recordings. You want to ensure that your recordings can be easily edited or shared later without any hassle. Popular formats include MP4, AVI, and WMV. Choose a format that suits your needs, especially when thinking about the platforms where you’ll share or view your content.
Common formats like MP4 are widely accepted, making them ideal for uploading to various platforms like YouTube or Vimeo. AVI can provide better quality but often results in larger file sizes, while WMV is great for Windows users but may have compatibility issues on other systems. Always evaluate your needs to find the best fit!
Privacy Considerations
Little things can make a massive difference when it comes to privacy. If you’re recording your screen, be mindful of the sensitive information on your display. Make sure to check what’s visible before you hit record, as capturing personal data can have severe consequences.
The reality is that sharing recordings without considering privacy can lead to identity theft or unwanted data exposure. It’s crucial to be careful, especially if you’re discussing confidential topics or showing private information. I’ve learned that keeping your audience’s trust is just as important as the content itself!
Summing up
Taking this into account, recording your screen in Windows 2024 is super easy and something you should definitely harness to elevate your content game. Whether you’re gaming, teaching, or just sharing ideas, tools like Xbox Game Bar or third-party apps have got your back. So, stop overthinking, grab your screen recorder of choice, and start showing the world what you’ve got to offer. You got this! Let’s make your voice heard—now go out there and create!
FAQ
Q: How can I record my screen on Windows 2024 using built-in tools?
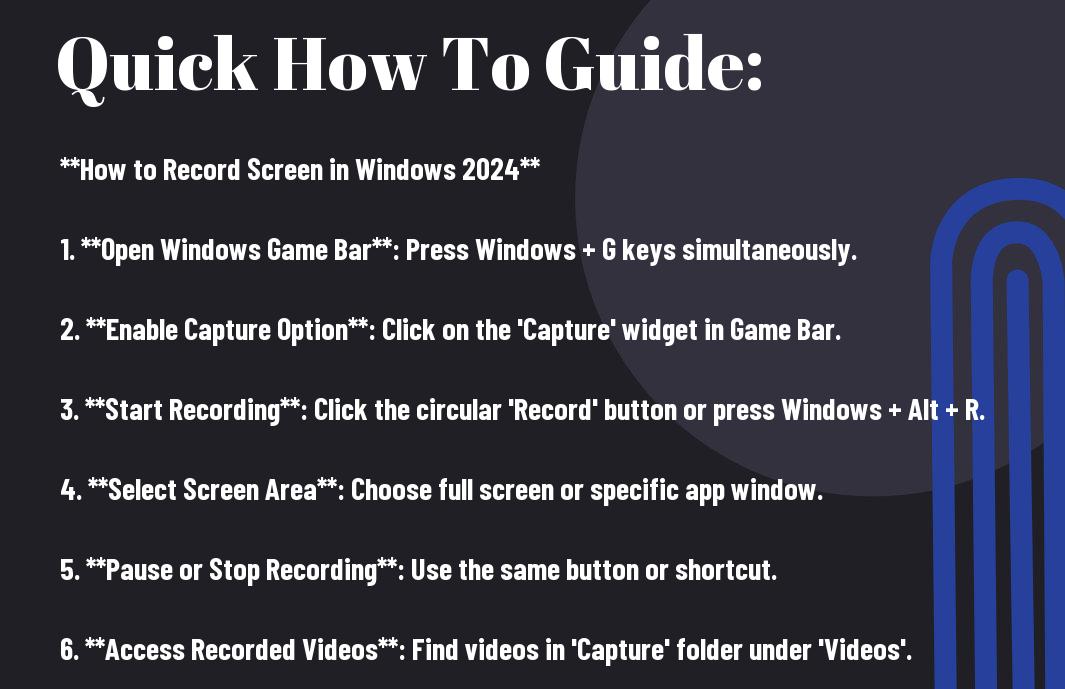
A: Windows 2024 has a screen recording tool called Xbox Game Bar. Press Windows key + G to open it, confirm the app is a game, then click “Record” or press Windows key + Alt + R to start. Stop recording by clicking the stop button or using the shortcut. Recordings are saved in Videos > Captures folder automatically.
Q: Are there any third-party applications I can use for screen recording in Windows 2024?
A: Yes, there are third-party applications like OBS Studio, Camtasia, and Bandicam for screen recording in Windows 2024. OBS Studio is free and highly customizable, Camtasia offers user-friendly editing tools, and Bandicam has high compression rates for smaller file sizes without quality loss. Choose the one that suits your needs!
Q: How can I edit my screen recordings after I capture them in Windows 2024?
A: After recording your screen on Windows 2024, you can edit the videos using various software. If you used the Xbox Game Bar, your recording will typically be in MP4 format, which is compatible with many editing programs. You can use simple built-in tools like the Photos app for basic video editing features such as trimming. For more advanced editing, software like Adobe Premiere Pro, Camtasia, or DaVinci Resolve is recommended for a more comprehensive editing experience, including color corrections, transitions, and adding text or music to your videos.